Appearance
Work on banners
eWizard offers a trendy channel for your brand promotion—banner. With this specifically designed content item, you can showcase your logo and message to a broad audience, enhancing brand recognition and awareness. eWizard allows you to send the banner for medical, legal, and regulatory approval to the target system. You can use programmatic ad platforms to place banners on websites and social media with high traffic to reach your target audience across different screens and devices.
The banner is available on demand. Contact the administrator for details.
The general banners workflow includes their creation/upload, editing, further export, publishing to target systems. Let's take a closer look at these processes.
Creation
You can add a new banner to Library in the following ways:
Create from scratch with the
Banneroption from the add new menu. In theCreate newpopup you can select several banner sizes.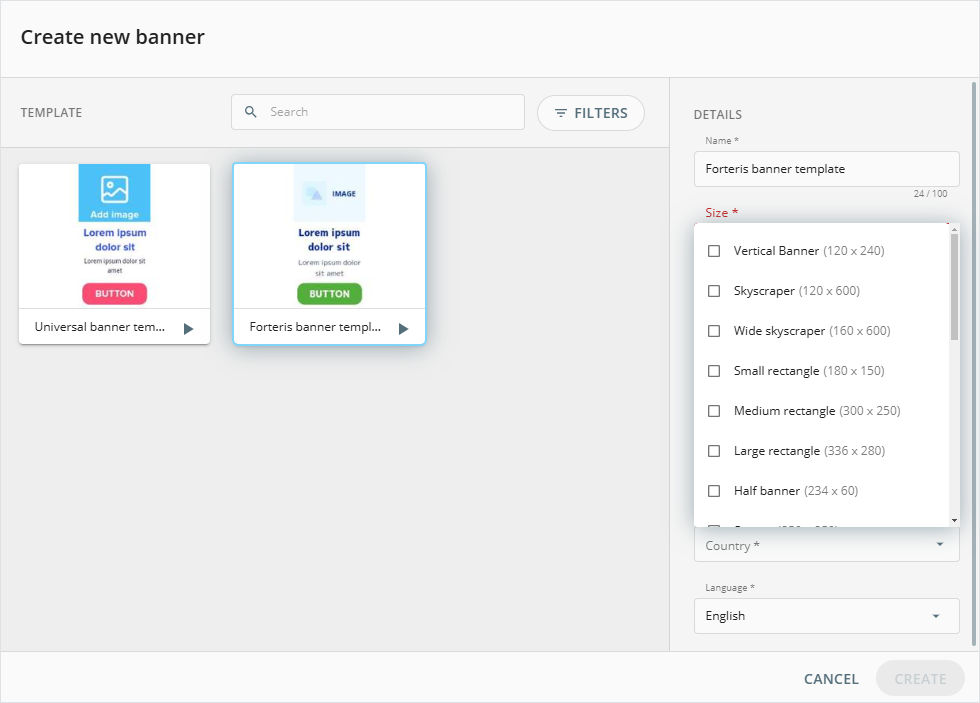
NaviGate templates
You can add the customized banner to NaviGate templates for reuse. When creating a banner from this template, your banner inherits the type and size of the customized template, even though the size option appears available for selection.
Upload an existing ZIP archive with the banner from your device.
The ZIP archive for upload must be created in the eWizard.js framework.
Upon successful creation or upload, your banner appears in My library.
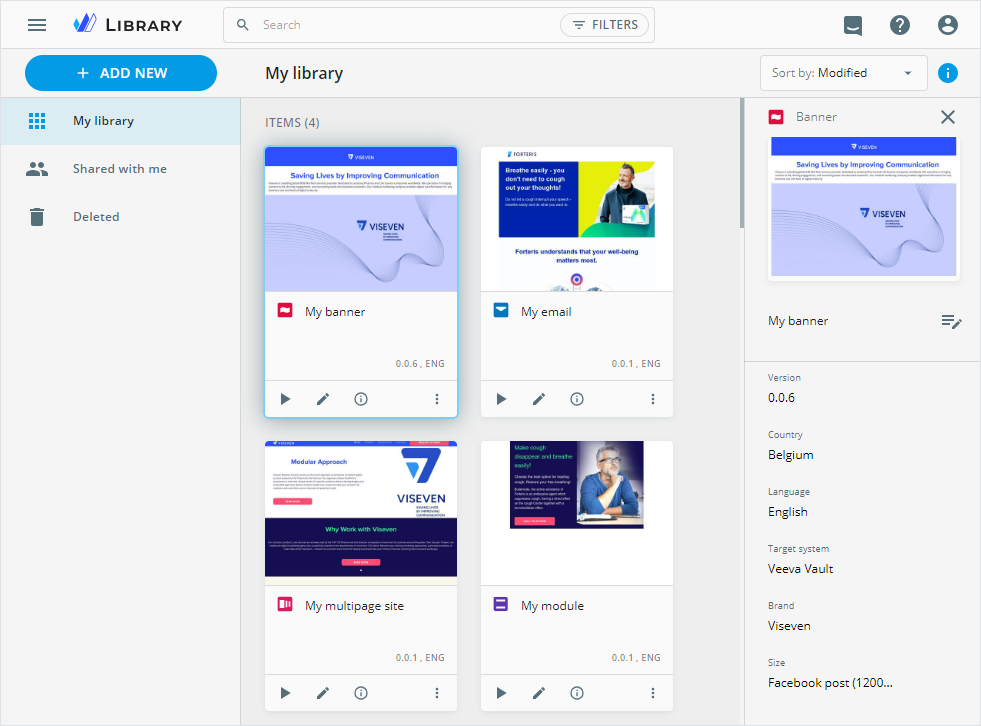
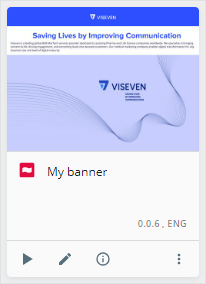
The banner card features its preview, name, version, and language.
You can also use the buttons on the card to perform the following actions:
| Option | Action |
|---|---|
| Preview your banner in Viewer that opens in a new tab. | |
| Style the banner in Editor that opens in a new tab. | |
| View the banner metadata and history on the Details page. | |
| Unfold the banner more options to access its additional functions. |
Editing
In eWizard Editor, you can manage banners in the following ways:
Add an empty structureless banner with no components or multisize template-based banners with the predefined structure and components.
Move different components to the banner layout, modify their properties and adjust styling.
Select the required default block on the
Blockstab and move it to the banner layout, manually customize its components, or pull assets from Veeva Vault PromoMats.Add animation effects to banner components for visual engagement and use the animation timeline to review, adjust, and preview animation in real time.
Pull ready-to-use content modules directly from Veeva Vault PromoMats and internal eWizard storage, streamlining content creation. For this, use the Assets popup or find the required content module on the
Blockstab → MODULES.If added content modules contain business rules, their validation automatically checks content modules against Veeva Vault PromoMats content rules, reducing errors and ensuring adherence to approval standards.
To open the banner in Editor, click ![]() on its card in Library.
on its card in Library.
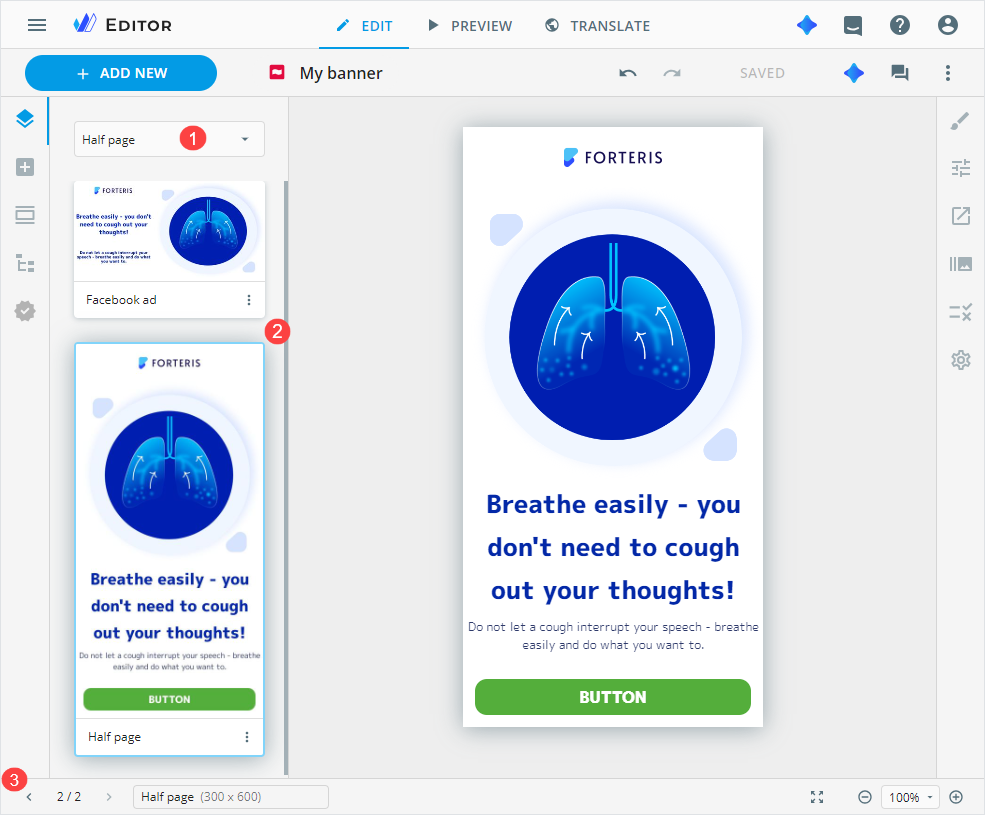
The banner Editor opens in a new browser tab and consists of the following areas:
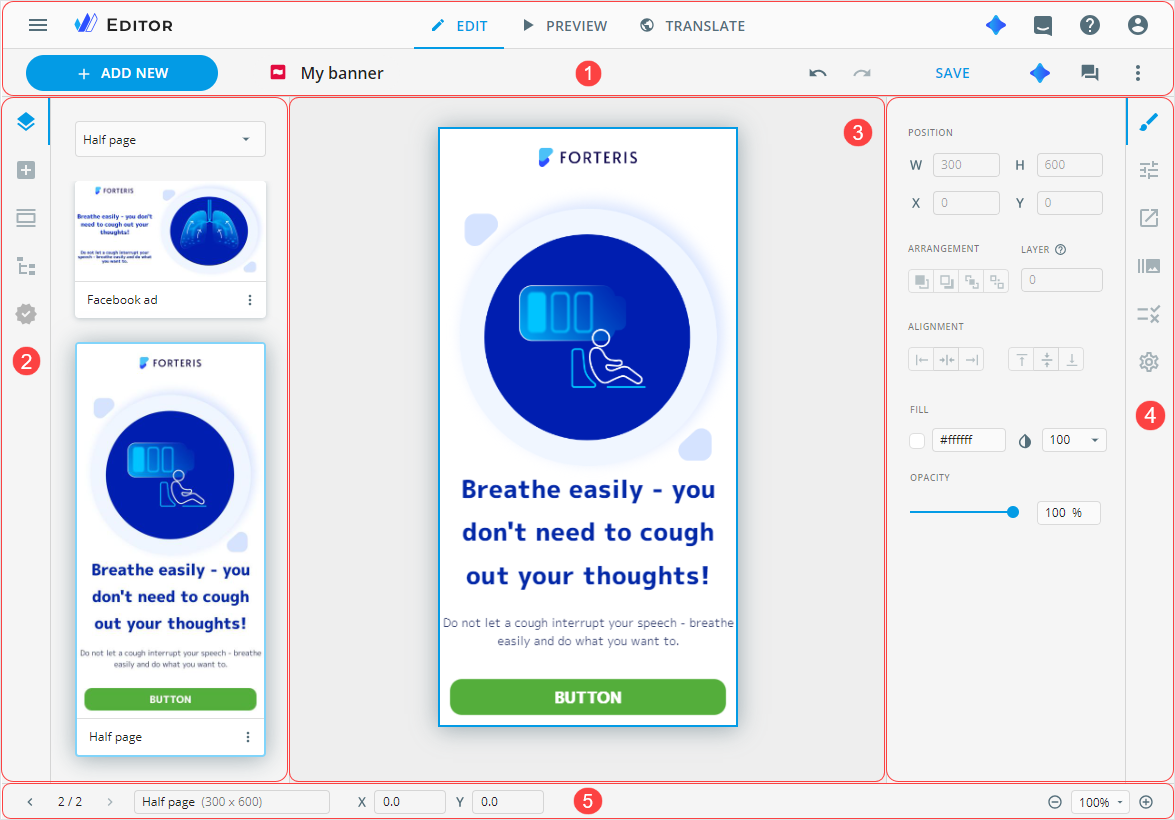
[1] The modes panel to switch between the Editor modes (EDIT, PREVIEW, and TRANSLATE) and a quick access toolbar for banner management in the following ways:
| Control | Action |
|---|---|
+ ADD NEW | Add one of the banner types:Blank banner—an empty structureless banner with no components.Banner from template—a banner with the predefined structure and components. You can select one or several template-based banners in the creation popup. |
Undo | Revert the most recent action or change made. |
Redo | Reapply the action or change that was previously undone. |
SAVE | Apply all the changes you made in the banner. |
eVa AI | Open the eVa AI conversational hub or chat to generate content, ready-to-use layouts, and receive interactive assistance. |
Comments | Launch the commenting panel. |
More options | Unfold the list of more options available for the banner. |
[2] The elements panel with the following tabs:
You can find the required banner on the
Navigationtab. For this:Select the size-specific banner from the dropdown list [1] by its name.
Scroll to the required size-specific banner [2].
Navigate between the multisize banners with the bottom bar controls [3].
Depending on the banner size, components may have pre-designed styling and properties.
Contact your administrator to customize the set of components.
[3] The banner layout, where you can arrange its various elements to match your editing requirements. Apply the component multiselect to copy and paste several banner components to the layouts within multisize banners.
[4] Customization panel with the following tabs:
| Tab | Description |
|---|---|
| Displays the selected component styling. | |
| Displays the selected component properties. | |
| Displays the link assigning action. The tab becomes available after the component selection on the banner layout. | |
| Displays animation effects available for the selected component. | |
| Displays the banner settings. | |
| Displays the business rules. |
[5] The bottom bar with the following controls:
| Control | Action |
|---|---|
| Navigate between the multisize banners. | |
| View the banner type and its size. | |
| X-/Y-axis values | Display the position of the selected component upper-left corner and the same corner of the layout. |
Scale the layout through its zooming in/out. Or you can select Adaptive view, Full size, Fit to screen, Fit to width from the zoom list. |
Sharing
eWizard allows you to share your banners with the collaborators. You can do this in the following ways:
Share link to generate the link to the banner and configure sharing settings.
Assign users to share your banner with specific users according to the defined roles.
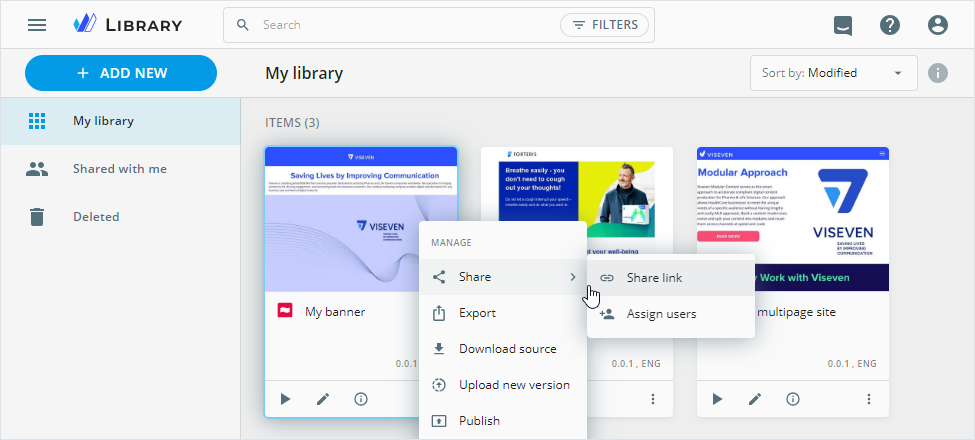
As a result, the collaborators can view, edit, or publish the shared banner.
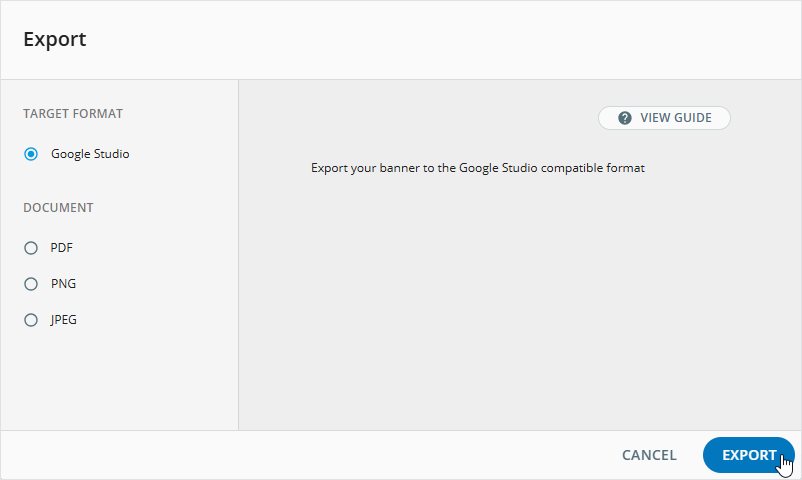
Export
Once your banner is ready for the target usage, you can launch its export with the more options menu.
The following export options are available for banners:
as an HTML file in Google Studio compatible format.
This export option is available on demand. Contact the administrator for details.
Export is available in banners built with the eWizard.js framework version 5.55.0 or later. Check the framework version on the banner Details page.
as a PDF file.
To highlight content modules and their modifications in the resulting PDF, select the
Highlight modulescheckbox.To include the
Outbound linkspage with the list of banner links in the resulting PDF file, select theAdd outbound linkscheckbox.
as an image in PNG or JPEG format.
Upon successful export, the resulting multisize banners are available for download in different forms:
Google Studio—as a ZIP archive with ZIP packages for each banner size. Each package includes an HTML file, banner thumbnail, all associated media assets, and fonts.
We recommend applying Google Fonts in your banners to optimize the content size after export.
Each multisize banner must include at least one link for the resulting archive to upload properly to Google Studio. Add a link to any banner component with the
Open linkaction or insert a text link in the WYSIWYG editor.
PDF export—as a single file.
PNG / PDF—as separate files.
Publishing
The eWizard Publish service allows you to submit your prepared banner to a target system with minimum manual operations. As a result, your banner is converted to the necessary build, then it's placed to the selected target system under your account according to the metadata specified during the publication process.
The banner publishing is initiated with the Publish option from the more menu. Select the target system and follow the publication steps.
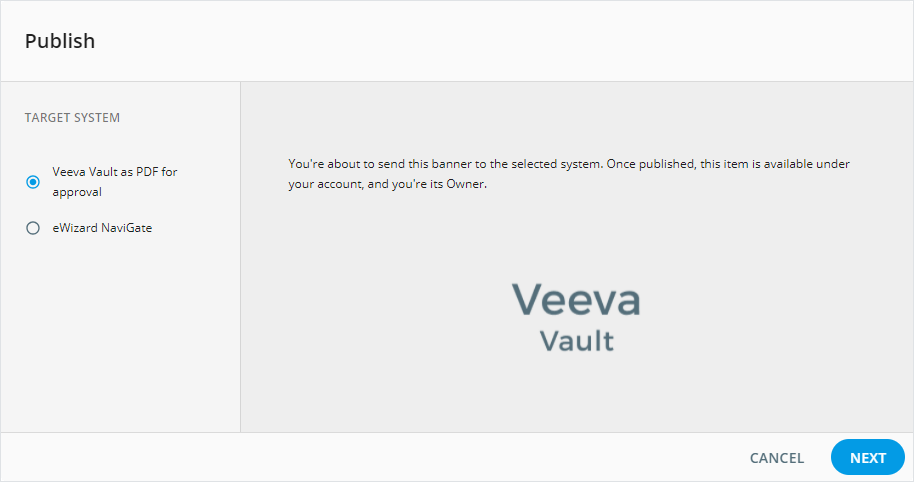
To highlight content modules and their modifications in the resulting PDF, select the Highlight modules checkbox on the PREPARATION step when publishing the banner to Veeva Vault PromoMats as PDF for approval.
After publishing the banner with added content modules from Veeva Vault PromoMats, you can follow the link in the Source Content Module field of the Approval Document in Veeva Vault PromoMats to access the Content Module object and its related assets.