Appearance
Development
With the commands from this article, you can develop your items locally in the following ways:
Run a development build and watch the changes in the browser as you update the project
Install components and dependencies
Add slides, subslides, or chapters to your e-Detailer
Generate thumbnails for slides
Archive your project for further uploading to the eWizard platform
Generate screenshots for the email preview and block icons
View the eWizard.js and eWizard CLI documentation
wiz dev [options]
Use the wiz dev command to run a development build. When your project is built locally, you can view it in the browser. The wiz dev command has the following options:
Options | Description |
|---|---|
--live | Tracks the changes and continuously builds the project using http://localhost:3000/ for live reloading. The default port for the localhost is 3000. For example, run wiz dev --live in your project root directory. Make any changes in the slide .vue file. The http://localhost:3000/page reloads automatically and shows your changes. |
--watch | Tracks the changes and continuously builds the project without the live reloading. When you run wiz dev --watch, refresh the browser page with your project homepage to see the changes. For example, open the index.html page in the root of your project in the browser. Make the changes in the slide .vue file. Refresh the browser page to see the changes. |
--debug | Builds the project with the source mapping. For example, run wiz dev --debug. |
--no-template | Builds the project without the ./build/dev/templates.js file. For example, run wiz dev --no-template. |
--from [LAYOUT_OR_WORKSPACE_NAME] | Builds the email project with a specified layout or workspace. You can build one layout at a time or multiple workspaces at the same time. For example, run wiz dev --from my_name to build your email with the specified layout or workspace: specific blocks, etc. The command archives the layout from the directory defined in the layouts field in system settings. The workspace directory must contain the email template. For more information, see Multi-layout templates and Monorepo projects. |
--from-all | Builds the email project with all workspaces. For example, wiz dev --from-all. |
--validate | Validates the HTML content in the <i18n> localization tags with HTML-validate. For example, wiz dev --validate. |
-h, --help | Shows help for the wiz dev command and options. For example, wiz dev -h. |
In monorepo emails you can only use the --from and --from-all options.
wiz install [options]
Use the wiz install or wiz i command to install the components as dependencies in the package.json file of your project. You can install the component either from CodeArtifact or from GitLab.
eWizard CLI installs the node modules for the specified components to the ./node_modules/@[SCOPE] subdirectory. For example, the wiz-card component for e-Detailers is installed in the ./node_modules/@edetailer subdirectory.
The item type defines which components are installed. See the list of the eWizard.js components for e-Detailers, emails, or sites.
To install a component from CodeArtifact, run:
shwiz install @[SCOPE]/[COMPONENT_NAME][SCOPE]is the CodeArtifact scope of your project. For example, the eWizard.js global CodeArtifact repository uses the item types as the scope:edetailer,email, andsite.[COMPONENT_NAME]is the name of the component in the eWizard.js repository, such aswiz-accordion.
For example, to install the e-Detailer
wiz-accordioncomponent from a CodeArtifact repository, run:shwiz install @edetailer/wiz-accordionBy default, the
wiz installcommand installs components from a repository of the instance you are logged in to, for example, Viseven. If you want to install components from the global repository, use the.wizrcconfiguration file or the hidden-r globaloption. For more information, see Import and register components from the CodeArtifact repository.As a result, the following dependency is created in the
package.jsonfile of the project:json// package.json { "dependencies": { "@edetailer/wiz-accordion": "^3.0.0", } }To install a component from GitLab, run the following:
shwiz install git+[COMPONENT_LINK]COMPONENT_LINKis the cloned HTTPS link to the component repository in GitLab.For example, to install the e-Detailer
wiz-cardcomponent, run the following:shwiz install git+https://git.qapint.com/ewizardjs/edetailer/components/wiz-card.gitAs a result, the following dependency is created in the
package.jsonfile of the project:json// package.json { "dependencies": { "@edetailer/wiz-card": "git+https://git.qapint.com/ewizardjs/edetailer/components/wiz-card.git", } }
In the legacy npm version, wiz install might update existing dependencies to newer versions based on the specified semver ranges in your package.json file. This can be convenient for development environments where you want to stay up-to-date with the latest changes.
To install the exact version of a specific component, run:
sh
wiz install @[SCOPE]/[COMPONENT_NAME] --save-exactor:
sh
wiz install @[SCOPE]/[COMPONENT_NAME] -ETo install the component to devDependencies, run:
sh
wiz install @[SCOPE]/[COMPONENT_NAME] --save-devor:
sh
wiz install @[SCOPE]/[COMPONENT_NAME] -DFor more information, see Import and register components.
The wiz install command has the following options:
Options | Description |
|---|---|
-h, --help | Shows help for the wiz install command and options. For example, wiz install -h. |
wiz publish [options]
Use the wiz publish command to publish a package to the private or global CodeArtifact repository.
You can publish to:
the global repository from any instance if you have access to the Admin panel
a private repository of the instance you are logged in
To set up a private repository, contact eWizard Support.
For example, if you are logged in to the Viseven instance, you can publish to the Viseven private repository or the global repository.
To publish packages to a private repository, run:
sh
wiz publish [PACKAGE_NAME][PACKAGE_NAME]is the name of the package.
For example, to publish the ewizardjs package:
sh
wiz publish ewizardjsTo publish packages to the global repository, run:
sh
wiz publish [PACKAGE_NAME] --repository globalor
sh
wiz publish [PACKAGE_NAME] -r globalThe wiz publish command has the following options:
Options | Description |
|---|---|
-r global, --repository global | Allows you to publish the packages to the global CodeArtifact repository. For example, wiz publish -r global. |
tag | Allows you to publish the packages with a distribution tag. You can use distribution tags to publish packages with clear labels. For example, to publish the package with a beta tag: wiz publish --tag beta. |
-h, --help | Shows help for the wiz publish command and options. For example, wiz publish -h. |
wiz unpublish [options]
Use the wiz unpublish command to remove a package version from the private or global CodeArtifact repository.
You can remove package versions from:
the global repository of any instance if you have access to the Admin panel.
a private repository of the instance you are logged in.
To set up a private repository, contact eWizard Support.
For example, if you are logged in to the Viseven instance, you can remove packages from the Viseven private repository or the global repository.
To remove package versions from a private repository, run:
sh
wiz unpublish [PACKAGE_NAME]@[PACKAGE_VERSION][PACKAGE_NAME]is the name of the package.[PACKAGE_VERSION]is the package version.
For example, to remove the eWizard.js 5.20.0 package version from the private repository:
sh
wiz unpublish eWizard.js@5.20.0To remove package versions from the global repository, run:
sh
wiz unpublish [PACKAGE_NAME]@[PACKAGE_VERSION] --repository globalor
sh
wiz unpublish [PACKAGE_NAME]@[PACKAGE_VERSION] -r globalThe wiz unpublish command has the following options:
Options | Description |
|---|---|
-r global, --repository global | Allows you to remove package versions from the global CodeArtifact repository. For example, wiz unpublish -r global. |
-h, --help | Shows help for the wiz unpublish command and options. For example, wiz unpublish -h. |
wiz uninstall [options]
Use the wiz uninstall or wiz rm command to remove packages from the ./node_modules directory of your project. The command affects all packages with dependencies in the package.json file: blocks, components, and the eWizard.js dependency.
To remove a dependency, run:
sh
wiz rm [DEPENDENCY_NAMES]or
sh
wiz uninstall [DEPENDENCY_NAMES][DEPENDENCY_NAMES] are the names of the dependencies in package.json.
For example, to remove the @blocks/module-placeholder block and the @edetailer/wiz-text component, run:
sh
wiz rm @blocks/module-placeholder @edetailer/wiz-textThe wiz uninstall command has the following options:
Options | Description |
|---|---|
-h, --help | Shows help for the wiz uninstall command and options. For example, wiz uninstall -h. |
wiz slide [options]
To add a slide to your e-Detailer project:
sh
wiz slide [SLIDE_ID]SLIDE_ID is a unique slide ID in the slides object of the structure.json file. For more information, see e-Detailer structure.
Options | Description |
|---|---|
-c, --chapter [CHAPTER_ID] | Adds your slide to the specified chapter where CHAPTER_ID is the ID of the chapter in the structure.json file. For example, run wiz slide new --chapter default to add the new slide to the default chapter in the ./structure.json file. This command also adds the ./slides/new directory to your e-Detailer project. |
-d, --delete [SLIDE_ID] | Deletes the specified slide from your e-Detailer project. For example, run wiz slide -d new to delete the new slide in the structure.json file. This command also deletes the ./slides/new directory. |
-h, --help | Shows help for the wiz slide command and options. For example, wiz slide -h. |
wiz subslide [options]
To add a subslide to the specific slide in your e-Detailer project:
sh
wiz subslide [SUBSLIDE_ID] -s [SLIDE_ID]SUBSLIDE_ID is a unique subslide ID and SLIDE_ID is the slide ID in the structure.json file. For more information, see Subslides.
Options | Description |
|---|---|
-s, --slide [SLIDE_ID] | Adds your subslide to the specified slide where SLIDE_ID is the ID of the slide to which you add your subslide. For example, run wiz subslide my_subslide -s new to add the my_subslide subslide to the new slide in the ./structure.json file. This command also adds the ./slides/my_slide directory to your e-Detailer project. This command also adds the my_subslide slide to the structure.json file. |
-h, --help | Shows help for the wiz subslide command and options. For example, wiz slide -h. |
wiz chapter [options]
To add a chapter to your e-Detailer:
sh
wiz chapter [CHAPTER_ID]CHAPTER_ID is a unique chapter ID in the structure.json file. For more information, see Chapters.
For example, run wiz chapter new to add the new chapter in the structure.json file. This command also adds the new chapter to the storyboard.
Options | Description |
|---|---|
-h, --help | Shows help for the wiz chapter command. For example, wiz chapter -h. |
wiz [options]
Use the wiz command with options to find out the current version of eWizard CLI and to display the help for all the commands available for eWizard CLI.
Options | Description |
|---|---|
-V, --version | Displays the current version of your eWizard CLI. For example, run wiz -V. |
wiz | Shows help for all the commands available for eWizard CLI. The same as wiz -h or wiz --help. |
-h, --help | Shows help for all the commands available for eWizard CLI. For example, wiz -h. |
wiz component build [options]
Use the wiz component build command in the component project root directory to run a development build of a component.
eWizard CLI checks for errors in the tag markup in the <template> and <script> tags. After running the wiz component build command, the errors are displayed in the command line tool. In case of no errors, the build is successful.
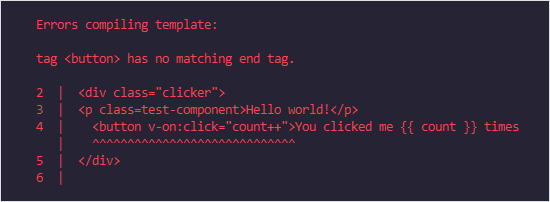
The resulting build is created in the dist/build.js file.
Options | Description |
|---|---|
--name [COMPONENT_NAME] | Updates the build name in the dist/build.js file. For example, run wiz component build --name my_component to set the current build name to my_component. |
-h, --help | Shows help for the wiz component build command and options. For example, wiz component build -h. |
wiz archive [options]
Use the wiz archive command in the project root to run the development build and create a ZIP archive of your project. You can upload the zipped project to the eWizard platform.
To exclude certain files from the development build, add the ignore object to the ./.ewizard/settings.json file. For example, to ignore all PNG files:
json
// ./.ewizard/settings.json
{
  "archive": {
    "ignore": ["-.png"]
  }
}
You can ignore specific files, all files that have the specified extension, or directories. To ignore a directory in your project:
json
// ./.ewizard/settings.json
{
  "archive": {
    "ignore": ["test/"] // When you run wiz archive, the test directory is excluded from the build.
  }
}
Options | Description |
|---|---|
--name [ARCHIVE_NAME] | Generates the archive with the specified name. For example, run wiz archive --name my_project to generate the my_project.zip project archive. You can use the --name option only for one archive. Change the project name in the ./settings.json file, which has the same result: the project name changes when you generate the build with wiz archive. |
--target [TARGET_CLM] | Adds configuration for the specified target system to the ./settings.json file in the zipped email project. For example, run wiz archive --target viseven. This command adds the targetCLM field that has the viseven value for code and Viseven for name in the settings.json file of your archived email project. See the list of target systems with codes. |
--theme [THEME_NAME] | Generates the email project archive with the specified theme name. For example, run wiz archive --theme viseven. This command adds viseven as the current theme in the ./settings.json file of the zipped project. This command also adds the ./themes directory in your project. |
--scheme [SCHEME_NAME] | Generates the email project archive with the specified scheme name. For example, run wiz archive --scheme viseven. This command adds the viseven value for the scheme field in the theme object of the ./settings.json file of the zipped project. The scheme field isn't used at the moment. |
--from [WORKSPACE_NAME] | Builds the email project with the specified workspaces. For example, run wiz archive --from my_workspace to build your email with the specified workspace: specific blocks, etc. The specified workspace directory must be in the emails directory of your monorepo. The specified workspace directory must contain the email template. For more information, see Monorepo projects. |
--from-all | Builds the email project with all layouts or workspaces. For example, wiz archive --from-all. |
-h, --help | Shows help for the wiz archive command and options. For example, wiz archive -h. |
To use the --from option for multiple layouts with the same name, write the layout option with the parent directory.
For example, to archive the layout1 layout from the Global directory:
sh
wiz archive --from Global/layout1When you run wiz archive with the identifyComponents system setting, eWizard adds a data-asset-id attribute with a unique value to each eWizard, Vue, and HTML component tag within the following files:
Master template
App.vuefile andindex.vuefiles for each slide in e-DetailersApp.vuefile in emails and landing pages
For example, the wiz-video component in the default e-Detailer slide:
html
<!-- ./slides/default/index.vue -->

<template>
<wiz-slide data-asset-id="653dln5y-94k4-xosz-ffbu-65hzt7m4uuog"> class="editable-block">
  <wiz-video id="wiz-video-c49a" class="default" src="./media/videos/my-video.mp4" data-asset-id="74aguf64-69i0-a2ba-we36-2sc5yf7pzppr"></wiz-video>
</wiz-slide>
</template>
The data-asset-id attribute is used for integrations with Contentful. It is also required for the Veeva Vault modules in the assets.json file.
As best practice, don't modify the data-asset-id attribute values in eWizard because they match the IDs of Contentful entries. Changing the attribute value will disrupt sync between the eWizard component and its matching entry in Contentful.
wiz thumbs [options]
Use the wiz thumbs command to generate thumbnails for all the slides in your e-Detailer, landing page, or multipage site.
It's necessary to generate thumbnails before using the item as a template in eWizard Library.
When you run this command for the first time, eWizard CLI installs the ewizardjs-screenshoter npm module. This module is required for generating screenshots. eWizard.js stores the generated thumbnail screenshot of each slide or site page in it's corresponding path. For example, ./slides/slide1/media/images/thumb.jpg or ./pages/page1/media/images/thumb.jpg. You can modify the path where the thumbnails are generated in the thumbnail option in system settings.
The wiz thumbs command doesn't generate thumbnails for archived slides and slides that aren't added to the chapter.
Options | Description |
|---|---|
--id | Generates the thumbnail for the specified slide or site page ID. For example, run wiz thumbs -s home to generate the thumbnail for the home page of your site. eWizard CLI adds the thumb.jpg thumbnail to the ./pages/home/media/images/ directory for the specified page. The default thumbnail has the size of 1.2 KB. All other page thumbnails have the size of 600 bites. |
-s, --slides [SLIDE_ID] | A deprecated command that generates the thumbnail for the specified slide. For example, run wiz thumbs -s default to generate the thumbnail for the default slide in your e-Detailer. eWizard CLI adds the thumb.jpg thumbnail to the ./slides/default/media/images/ directory for the specified slide. The default thumbnail has the size of 1.2 KB. All other slides thumbnails have the size of 600 bites. |
-d, --delay [DELAY_IN_MS] | Generates the thumbnails with the specified delay in milliseconds. For example, run wiz thumbs -d 1000 to have a 1000 ms delay before generating the screenshot of your slides. |
-h, --help | Shows help for the wiz thumbs command and options. For example, wiz thumbs -h. |
To ensure the thumbnail includes all changes to the e-Detailer, run a development build before running wiz thumbs. If the development build doesn't exist in the project, eWizard.js runs the wiz dev command automatically.
Thumbnails for themes
To generate thumbnails for all themes with wiz thumbs, set the screenshoter.thumbForEachTheme setting to true for e-Detailers, landing pages, or multipage sites. This ensures the correct display of thumbnails in the eWizard platform.
json
// ./settings.json

{
  "screenshoter": {
    "thumbForEachTheme": true,
  }
}
When you run wiz thumbs, the command generates thumbnails for all themes. As a result:
Thumbnails for all themes other than the
currenttheme are generated to the directory configured in thepath.slide.thumbnailsoption of the item system settings. The default value ismedia/images/thumbs.Thumbnails for the
currenttheme are generated to the corresponding directory of each slide or site page configured in the system settingspath.slide.thumbnailoption.
Use only the wiz thumbs command with the thumbForEachTheme setting to generate the thumbnails. Don't add files to the folder to prevent errors.
json
// ./.ewizard/settings.json

{
  "path": {
      "slide": {
        "thumbnails": "media/images/thumbs",
      }
  }
}
When you select a theme in the uploaded template in eWizard Library, the thumbnail from the directory defined in the path.slide.thumbnail setting is replaced by the thumbnail of the selected theme from the directory defined in path.slide.thumbnails. Other thumbnails are deleted.
As a result, the correct thumbnails are displayed on the sidebar for e-Detailers, landing pages, and multipage sites.
Live thumbnail update
Global changes to an e-Detailer, for example, structure modification, require updating all its slide thumbnails with a navigation menu, so your changes are reflected. The similar scenario can occur with any changes you make to references or footnotes on e-Detailer slides. To automate the process, you can configure the live thumbnail update to depend on global component modifications or ignore them.
For this, add the dependsOn object in the index.vue file of every slide or page you need to set live thumbnail update. Set the values for the keys you need to trigger thumbnail update to true. For example, configure dependsOn in the /slides/default/index.vue file as follows:
txt
<config lang="json">
{
  "dependsOn": {
    "$references": true,
    "$footnotes": true,
    "$structure": false
  }
}
</config>
In this example, any changes to references and footnotes in the given e-Detailer slide result in the slide thumbnail update, while any changes to the structure won't trigger it. The thumbnails are updated upon saving the changes.
| Component definition | Live-updated? |
|---|---|
"$component-name": true | Yes |
"$component-name": false | No |
Requirements for correct operation
- Set
lang="json"for theconfigtag. - Update your eWizard.js version to v5.48.0 or later.
- Update your eWizard CLI version to v1.8.0 or later.
wiz screen preview
To generate a preview screenshot of your email:
sh
wiz screen previewThis command creates the preview.jpg file in the root of your email project.
To ensure the preview includes all changes to the email, run a development build before running wiz screen preview. If the development build doesn't exist in the project, eWizard.js runs the wiz dev command automatically.
To view help for the command, run wiz screen preview --help.
wiz screen block [options]
To generate the icon screenshots for the blocks in your email:
sh
wiz screen blockThis command generates the icon.png screenshot files for each block in your email project. The icon PNG file is a screenshot of the email block. When you run the command, eWizard CLI displays the messages indicating the path to the generated icons. The location of the generated icons is configured in the blocks field of the ./.ewizard/settings.json file. Each block directory contains the generated icon.
To ensure icon.png includes all changes to the email, run a development build before running wiz screen block. If the development build doesn't exist in the project, eWizard.js runs the wiz dev command automatically.
json
{
  "path": {
    "blocks": "common/blocks-library"
  }
}
For the wiz screen block command, you can generate the block icons for the specific theme and specific target systems in the icon-[THEME_NAME]-[CLM_COD].png format. To do this, you must have THEME_NAME specified as the current theme and CLM_CODE specified as code in the ./settings.json file. For more information, see Set up the themes directory and CLM-dependent blocks.
The wiz screen block command has the following options:
| Option | Description |
|---|---|
-a or --all | Generates the icon screenshots for all the blocks, all themes, and all target systems. For example, wiz screen block -a. |
-c [CLM_CODE] or --clm [CLM_CODE] | Generates the icon-[THEME_NAME]-[CLM_CODE].png icon files for all themes and the specified target system for each block in your email project. For example, wiz screen block -c oce-sales. |
-t [THEME_NAME] or --theme [THEME_NAME] | Generates the icon-[THEME_NAME]-[CLM_CODE].png icon files for all target systems and the specified theme for each block in your email project. For example, wiz screen block -t viseven-dark. |
-t [THEME_NAME] -c [CLM_CODE] or --theme [THEME_NAME] --clm [CLM_CODE] | Generates the icon-[THEME_NAME]-[CLM_CODE].png icon files for the specified theme and target system for each block in your email project. For example, wiz screen block -t viseven-dark -c oce-sales. |
-i [BLOCK_ID] or --id [BLOCK_ID] | Generates the icon-[THEME_NAME]-[CLM_CODE].png icon files for the specified block in your email project. For example, wiz screen block -i header-1a. |
-i [BLOCK_ID] -c [CLM_CODE] or --id [BLOCK_ID] --clm [CLM_CODE] | Generates the icon-[THEME_NAME]-[CLM_CODE].png icon files for the specified block, all themes, and the specified target system in your email project. |
-i [BLOCK_ID] -t [THEME_NAME] or --id [BLOCK_ID] --theme [THEME_NAME] | Generates the icon-[THEME_NAME]-[CLM_CODE].png icon file for the specified block, specified theme, and specified target system in your email project. |
-h or --help | Shows help for the wiz screen block command and options. For example, wiz screen -h. |
See the detailed description of the wiz screen block options below.
To generate the icon screenshots for all the blocks, all themes, and all target systems:
shwiz screen block -aThis command generates the
icon-[THEME_NAME]-[CLM_CODE].pngicon files for all themes and target systems for each block in your email project. eWizard CLI takesTHEME_NAMEfrom theidfield in the./themes/themes.jsonfile and usesCLM_CODEfrom the list of target systems.json//./themes/themes.json { "themes": [ { "id": "viseven", "name": "Viseven", "dependencies": { "brand": ["viseven"] } }, { "id": "viseven-dark", "name": "Viseven dark", "dependencies": { "brand": ["viseven"] } } ] }To generate the icon screenshots for all the blocks, all themes, and one specific target system:
shwiz screen block -c [CLM_CODE]Here,
CLM_CODEis the code of the target system. For example, runwiz screen block -c oce-salesto generate the icons in the following format:icon-viseven-oce-sales,icon-viseven-dark-oce-sales.png, etc.This command generates the
icon-[THEME_NAME]-[CLM_CODE].pngicon files for all themes and the specified target system for each block in your email project. eWizard CLI takesTHEME_NAMEfrom theidfield in the./themes/themes.jsonfile.To generate the icon screenshots for all the blocks, all target systems, and one specific theme:
shwiz screen block -t [THEME_NAME]Here,
THEME_NAMEis theidof the specified theme from the./themes/themes.jsonfile. For example, runwiz screen block -t viseven-darkto generate the icons in the following format:icon-viseven-dark-oce-sales.png,icon-viseven-dark-veeva.png, etc.This command generates the
icon-[THEME_NAME]-[CLM_CODE].pngicon files for all target systems and the specified theme for each block in your email project. eWizard CLI usesCLM_CODEfrom the list of target systems.To generate the icon screenshots for all the blocks, one specific target system, and one specific theme:
shwiz screen block -t [THEME_NAME] -c [CLM_CODE]For example, run
wiz screen block -t viseven-dark -c oce-salesto generate the blocks icons in the following format:icon-viseven-dark-oce-sales.png.This command generates the
icon-[THEME_NAME]-[CLM_CODE].pngicon files for the specified theme and target system for each block in your email project. eWizard CLI takesTHEME_NAMEfrom theidfield in the./themes/themes.jsonfile.To generate the icon screenshots of one block for all themes and target systems:
shwiz screen block -i [BLOCK_ID]Here,
BLOCK_IDis theidfield for the block in the./common/blocks-library/blocks.jsonfile. For example, runwiz screen block -i header-1ato generate icons of the same block in the following format:icon-viseven-dark-oce-sales.png,icon-viseven-iqvia.png, etc.This command generates the
icon-[THEME_NAME]-[CLM_CODE].pngicon files for the specified block in your email project. eWizard CLI takesTHEME_NAMEfrom theidfield in the./themes/themes.jsonfile and usesCLM_CODEfrom the list of target systems.To generate the icon screenshots of one block for all themes and one target system:
shwiz screen block -i [BLOCK_ID] -c [CLM_CODE]For example, run
wiz screen block -i header-1a -c oce-salesto generate icons of the same block in the following format:icon-viseven-dark-oce-sales.png,icon-viseven-oce-sales.png, etc.This command generates the
icon-[THEME_NAME]-[CLM_CODE].pngicon files for the specified block, all themes, and the specified target system in your email project. eWizard CLI takesTHEME_NAMEfrom theidfield in the./themes/themes.jsonfile and usesCLM_CODEfrom the list of target systems.To generate the icon screenshots of one block for one theme and all target systems:
shwiz screen block -i [BLOCK_ID] -t [THEME_NAME]For example, run
wiz screen block -i header-1a -t viseven-darkto generate icons of the same block in the following format:icon-viseven-dark-oce-sales.png,icon-viseven-dark-iqvia.png, etc.This command generates the
icon-[THEME_NAME]-[CLM_CODE].pngicon files for the specified block, specified theme, and all target systems in your email project. eWizard CLI takesTHEME_NAMEfrom theidfield in the./themes/themes.jsonfile and usesCLM_CODEfrom the list of target systems.To generate the icon screenshot of one block for one theme and one target system:
shwiz screen block -i [BLOCK_ID] -t [THEME_NAME] -c [CLM_CODE]For example, run
wiz screen block -i header-1a -t viseven-dark -c oce-salesto generate an icon of the specified block in the following format:icon-viseven-dark-oce-sales.png.This command generates the
icon-[THEME_NAME]-[CLM_CODE].pngicon file for the specified block, specified theme, and specified target system in your email project. eWizard CLI takesTHEME_NAMEfrom theidfield in the./themes/themes.jsonfile and usesCLM_CODEfrom the list of target systems.
wiz docs [options]
Use the wiz docs command to open the documentation site for eWizard.js and eWizard CLI. When you run this command, eWizard CLI opens the eWizard.js framework documentation site in your default browser.
| Option | Description |
|---|---|
--edetailer | Opens the e-Detailer development documentation section. For example, wiz docs --edetailer. |
--email | Opens the Email development documentation section. For example, wiz docs --email. |
--site | Opens the Site development documentation section. For example, wiz docs --site. |
-h or --help | Shows help for the wiz docs command and options. For example, wiz docs -h. |
wiz update [options]
Use the options of the wiz update or wiz up command to update:
the
dependenciesfrom thepackage.jsonfile of your project: eWizard.js blocks, components, or npm packagesThe command works only for public GitLab repositories and npm packages. You need to
--skipthe dependencies of components installed from CodeArtifact.After running
wiz update, eWizard CLI checks the versions of the dependencies in your project and updates them to the latest versions of their major releases. The command skips the components that have the latest versions installed.the version of the e-Detailer structure file
the version of the references file
For more information about the major/minor versions and patches, see Semantic Versioning 2.0.0.
After you run the wiz update command, eWizard CLI automatically launches the wiz dev command if the e-Detailer structure file, the references file, or at least one of the dependencies has been updated.
The wiz update command has the following options:
| Option | Description |
|---|---|
--major | Updates the dependencies to the latest versions of the last major release. For more information, see wiz update --major. |
--no-major | Updates the dependencies to the latest versions of the same major release. For more information, see wiz update --no-major. |
--skip | Skips a component. For example, to update all components except wiz-accordion, run wiz update --skip wiz-accordion. For more information, see wiz update --skip. |
--structure | Updates the version of the e-Detailer structure file. For more information, see wiz update --structure. |
--references | Updates the version of the references file. For more information, see wiz update --references. |
--deep-selector | Replaces the deprecated /deep/ and >>> SCSS selectors and displays a message confirming successful replacement or stating that no files need to be modified. |
-h or --help | Shows help for the wiz update command and options. For example, wiz update -h. |
The --structure and --references options don't affect the dependencies in package.json.
See the detailed description of the wiz update options later in this article.
wiz update
To update all GitLab and npm dependencies in a project, run:
sh
wiz updateWhen the current dependency version is from a previous major release, you can choose the latest version for each major release after running
wiz update.If you choose the version of the dependency that's already installed, the dependency is skipped and isn't updated.
For example, the current version of the
wiz-blockcomponent in the project is the latest in a previous major release—1.0.1. The version of thewiz-buttoncomponent is from a previous major release—v1.4.1:json// package.json { "dependencies": { "wiz-block": "git+https://git.qapint.com/ewizardjs/edetailer/components/wiz-block.git#1.0.1", "wiz-button": "git+https://git.qapint.com/ewizardjs/edetailer/components/wiz-button.git#v1.4.1", } }After running
wiz update, you can choose the versions to updatewiz-blockandwiz-buttonto.You can leave
wiz-blockon the same version—1.0.1, or updatewiz-blockto the2.0.0version.
You can install one of the latest versions of
wiz-buttonfrom each major release:v1.4.3,2.0.1, or3.0.7.
In this example,
wiz-blockis updated to the2.0.0version andwiz-button—to version2.0.1:json// package.json { "dependencies": { "wiz-block": "git+https://git.qapint.com/ewizardjs/edetailer/components/wiz-block.git#2.0.0", "wiz-button": "git+https://git.qapint.com/ewizardjs/edetailer/components/wiz-button.git#2.0.1" } }When the current dependency version is from the latest major release,
wiz updateupdates the version to the latest release.For example, the current version of the
wiz-textcomponent in the project is from the latest major release—2.0.1:json// package.json { "dependencies": { "wiz-text": "git+https://git.qapint.com/ewizardjs/edetailer/components/wiz-text.git#2.0.1" } }The latest version of the component in the
wiz-textrepository is in the same major release—2.0.3.After running
wiz update, thewiz-textversion is updated to the latest2.0.3version of the latest major release:json// package.json { "dependencies": { "wiz-text": "git+https://git.qapint.com/ewizardjs/edetailer/components/wiz-text.git#2.0.3" } }When a component in
package.jsonhas a dependency to a branch, you can choose either the latest component version in the latest major release, or the version from the specified branch.
The --major and --no-major options don't apply if the component has a dependency to a branch.
For example, the wiz-button has a dependency with the develop branch in the repository:
json
// package.json

{
  "dependencies": {
    "wiz-button": "git+https://git.qapint.com/ewizardjs/edetailer/components/wiz-button.git#develop",
  }
}
After running wiz update, you can choose either the latest 4.0.0 version, or the develop version:

wiz update [DEPENDENCY_NAME]
To update a specific dependency, run:
sh
wiz update [DEPENDENCY_NAME]DEPENDENCY_NAME is the name of the dependency in the package.json file.
For example, the ewizardjs version:
sh
wiz update ewizardjsYou can also update multiple dependencies at once, such as the wiz-button component and the @blocks/header-1a block:
sh
wiz update wiz-button @blocks/header-1aThe component name must be the same as in the package.json file of the repository.
Update specific components using the same version logic as for the wiz update command.
wiz update --major
To update all GitLab and npm components to the latest versions of their last major releases, run:
sh
wiz update --majorFor example, the wiz-button repository has the v1.4.3, 2.0.1, and 3.0.7 latest versions in each major release. The current version of the wiz-button component in the project is from a previous major release—v1.4.1. The wiz-text repository has the v1.3.3 and 2.0.3 latest versions in each major release. The current version of the wiz-text component in the project is from the latest major release—2.0.1
json
// package.json

{
  "dependencies": {
    "wiz-button": "git+https://git.qapint.com/ewizardjs/edetailer/components/wiz-button.git#v1.4.1",
    "wiz-text": "git+https://git.qapint.com/ewizardjs/edetailer/components/wiz-text.git#2.0.1"
  }
}
After running the wiz update --major command, the wiz-button and wiz-text components are updated to the latest versions of the last major releases: 3.0.7 and 2.0.3, respectively:
json
// package.json

{
  "dependencies": {
    "wiz-button": "git+https://git.qapint.com/ewizardjs/edetailer/components/wiz-button.git#3.0.7",
    "wiz-text": "git+https://git.qapint.com/ewizardjs/edetailer/components/wiz-text.git#2.0.3"
  }
}
wiz update --no-major
To update all GitLab and npm dependencies without changing the major version, run:
sh
wiz update --no-majorFor example, the wiz-button repository has the v1.4.3, 2.0.1, and 3.0.7 latest versions in each major release. The current version of the wiz-button component in the project is v1.4.1:
json
// package.json

{
  "dependencies": {
    "wiz-button": "git+https://git.qapint.com/ewizardjs/edetailer/components/wiz-button.git#v1.4.1",
  }
}
After running wiz update --no-major, the wiz-button component is updated to the latest patch version of the same major release, which is v1.4.3:
json
// package.json

{
  "dependencies": {
    "wiz-button": "git+https://git.qapint.com/ewizardjs/edetailer/components/wiz-button.git#v1.4.3",
  }
}
wiz update --skip
To skip updating a dependency, for example, the @edetailer/wiz-references CodeArtifact component, run:
sh
wiz update --skip @edetailer/wiz-referencesOr, the wiz-button component and the @blocks/content-2a block:
sh
wiz update --skip wiz-button @blocks/content-2awiz update --structure
To update the e-Detailer structure.json file from version 1 to version 2, run:
sh
wiz update --structureThe differences between versions 1 and 2 are the following:
Additional
structureFileVersionfield that shows the version of the./structure.jsonfile.The updated chapter structure.
The subslides are now added to the
chaptersobject instead of theslidesobject.New
hiddenfield instead of the!symbol to hide slides, subslides, and chapters.Added the possibility to archive slides.
For more information, see Slides and chapters structure.
wiz update --structure uses the methods of the Structure plugin to update the structure.json version.
Hidden slides and chapters from structure.json version 1 are converted to version 2 as follows:
Version 1 slides that aren't in a chapter or hidden with
!are converted to version 2 as archived.Version 1 chapters that aren't in a storyboard or hidden with
!are converted to version 2 ashidden. Chapters can't be archived.
wiz update --references
Starting from eWizard.js 5.18.0, the references.json file doesn't include language keys, and the default path to the file is common/resources/references.json. For more information, see Localization of references in eWizard.js 5.18.0 and later and References.
To update the references.json structure and move it to the ./common/resources directory, run:
sh
wiz update --referencesThe command checks the references.json path defined in system settings.
wiz create [options]
Use the wiz create commands to create an archive of a monorepo eWizard template or a master template layout).
To create an archive of an eWizard template from a master template, run:
sh
wiz create ewizard-templatewiz create ewizard-template works only with monorepo emails.
To create an archive of an email layout, run:
sh
wiz create layoutThe wiz create layout and wiz create ewizard-template commands have the following options:
| Option | Description |
|---|---|
--from [LAYOUT_NAME] | Archives an eWizard template, or a master template layout from the specified layout directory. For example, wiz create layout --from layout1. |
--name [LAYOUT_NAME] | Sets a name for the archive eWizard template or layout. For example, wiz create layout --from layout1 --name myarchive. The --name option works only for one layout at a time. |
--target [TARGET_CLM] | Adds configuration for the specified target system to the ./settings.json in the archived email project. For example, run wiz create ewizard-template --target viseven. This command adds the targetCLM field that has the viseven value for code and Viseven for name in the settings.json file of your archived email project. See the list of target systems with codes. |
--theme [THEME_NAME] | Generates the email project archive with the specified theme name. For example, run wiz create layout --theme viseven. This command adds viseven as the current theme in the ./settings.json file of the zipped project. |
--scheme | Generates the email project archive with the specified scheme name. For example, run wiz create ewizard-template --scheme viseven. This command adds the viseven value for the scheme field in the theme object of the ./settings.json file of the zipped project. The scheme field isn't used at the moment. |
--from-all | Creates an archive from all layouts of the email project. |
--no-archive | Saves the email project locally without creating an archive. |
-h or --help | Shows help for the wiz create command and options. For example, wiz create -h. |
See the detailed option descriptions below.
--from
Use the --from option to archive an ewizard template or layout. The command archives the layout from the directory defined in the layouts field in system settings.
To archive an eWizard template from a master template, run:
sh
wiz create ewizard-template --from [LAYOUT_NAME][LAYOUT_NAME] is the name of the layout of the master template.
As a result, the layout1 folder is archived as an eWizard template. The master template settings are added as a dependency in the package.json file:
json
// ./package.json

{
  "dependencies": {
    "master": "git+https://git.qapint.com/myrepository"
  }
To archive a specific email layout, run:
sh
wiz create layout --from [LAYOUT_NAME][LAYOUT_NAME] is the name of the layout or workspace located in the ./layouts folder of the master template or ewizard-template respectfully.
For example, to archive a layout from layout1:
sh
wiz create layout --from layout1--name
Use the --name option to archive an eWizard template or layout with a specific name.
For example, to archive an eWizard template with the my_archive name:
sh
wiz create ewizard-template --from layout1 --name my_archiveTo archive a layout with the my_archive name:
sh
wiz create layout --from layout1 --name my_archive--target
Use the --target option to change the target system settings in the resulting archive. The option updates the targetCLM field in the ./settings.json file of the email.
For example, to change the target system settings to veeva:
In the eWizard template archive:
shwiz create ewizard-template --from layout1 --target veevaIn the layout or workspace archive:
shwiz create layout --from layout1 --target veeva
As a result, the targetCLM field is updated as follows:
json
// ./settings.json

{
  "targetCLM": {
    "name": "Veeva Vault",
    "code": "veeva"
  }
}
--theme
Use the --theme option to set the current theme of the archive. The option updates the current field in the theme object of the ./settings.json file.
For example, to update the current theme to theme1:
In the eWizard template archive:
shwiz create ewizard-template --from layout1 --theme theme1In the layout or workspace archive:
shwiz create layout --from layout1 --theme theme1
As a result, the current theme is updated as follows:
json
// ./settings.json

{
  "theme": {
      "default": "theme2",
      "current": "theme1",
      "scheme": "scheme1"
  }
}
--scheme
Use the --scheme option to update the scheme of the archive. The option updates the scheme field in the theme object of the ./settings.json file.
To update the scheme field:
In the eWizard template archive:
shwiz create ewizard-template --scheme scheme2In the layout or workspace archive:
shwiz create layout --scheme scheme2
As a result, the ./settings.json file is updated as follows:
json
// ./settings.json

{
  "theme": {
      "default": "theme2",
      "current": "theme1",
      "scheme": "scheme2"
  }
}
--from-all
Use the --from-all option to create an archive from all layouts.
To create an eWizard template archive from all layouts:
sh
wiz create ewizard-template --from-allTo create a layout or workspace archive from all layouts:
sh
wiz create layout --from-all--no-archive
Use the --no-archive option to save the email directory on your computer without archiving it.
To save an eWizard template on your computer:
sh
wiz create ewizard-template --from-all --no-archiveTo save a layout on your computer:
sh
wiz create layout --from layout1 --no-archivewiz clone
With the wiz clone command, you can clone any item from eWizard Editor, like an e-Detailer, email, or site.
Cloned projects are useful for collaborative editing: you can work on them with someone else at the same time. Update a project on your computer and push your version upstream with the wiz push command. You can also pull changes pushed by someone else with the wiz pull command.
To clone a project on your computer:
Go to an empty directory where you want to clone the project to.
For example, create the
my-cloned-edetailerdirectory and then:shcd my-cloned-edetailerIn the empty directory, run:
shwiz clone [PROJECT_ID][PROJECT_ID]is the ID of your project in eWizard Editor. You can copy it from the address bar of your browser.
As a result, the directory with the source files is created in the project.
The wiz clone command has the following options:
| Option | Description |
|---|---|
-h or --help | Shows help for the wiz clone command and options. For example, wiz clone -h. |
wiz push
Use the wiz push command to overwrite the changes in the upstream project with the changes from your cloned project.
sh
wiz pushThe wiz push command has the following options:
| Option | Description |
|---|---|
--force | Overwrites the changes in the upstream project with local changes. For example wiz push --force. |
-h or --help | Shows help for the wiz push command and options. For example, wiz push -h. |
wiz pull
The wiz pull command allows you to overwrite the changes in your cloned project with the changes from the upstream project.
sh
wiz pullThe wiz pull command has the following options:
| Option | Description |
|---|---|
--accept | Used for resolving merge conflicts based on the specified option. The --accept local option discards the changes in the upstream project and saves the changes made locally. The --accept upstream option overwrites local changes with the changes from the upstream project. |
-h or --help | Shows help for the wiz pull command and options. For example, wiz pull -h. |
The wiz pull command supports version control.
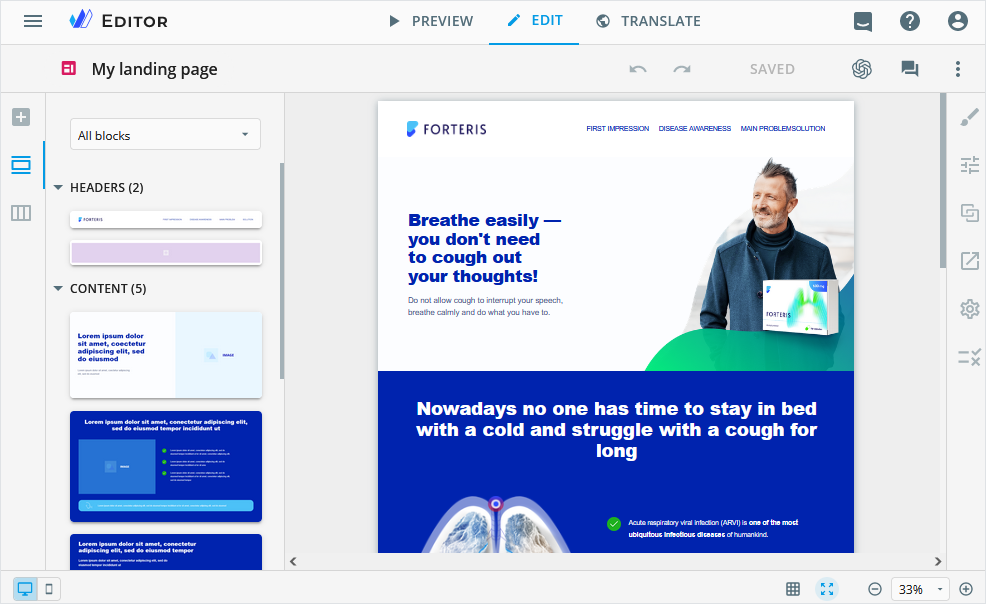
For example, a project in eWizard Editor with a button on the layout with BUTTON TEXT.

After you clone the project and open it in eWizard.js, the file looks like this:
html
<i18n>
{
	"eng": {
		"wiz_button_42e8": "<div style=\"line-height:16px;text-align:center;\"><span style=\"color:#fafafa;font-size:14px;\">BUTTON TEXT</span></div>"
	}
}
</i18n>
In eWizard.js the button text is changed to BUTTON TEXT 1:
html
<i18n>
{
	"eng": {
		"wiz_button_42e8": "<div style=\"line-height:16px;text-align:center;\"><span style=\"color:#fafafa;font-size:14px;\">BUTTON TEXT 1</span></div>"
	}
}
</i18n>
In eWizard Editor the text is changed to BUTTON TEXT 2:

After running the wiz pull command, there is a merge conflict.

To resolve the merge conflict you can:
Apply your local changesOr use the
wiz pull --accept localcommandOverwrite your local changesOr use the
wiz pull --accept upstreamcommandFix conflicts in files individuallyThis opens the merge conflict tool of your code editor:
